Showing posts with label color. Show all posts

Saturday, July 28, 2012

Color Splash (GIMP)

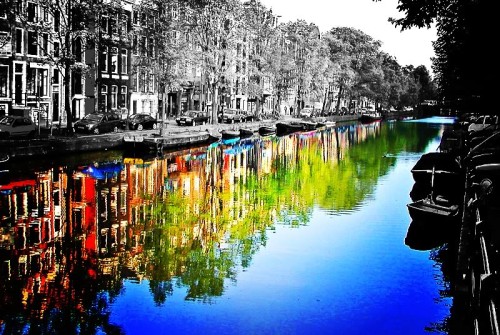
This tutorial will show you how to make a black and white photo with a "splash" of color in it. This technique can be used for modeling competition entries and other types of edits. Here are some examples of the color splash effect:
 

For this tutorial, I will be using this photo of one of my models, Dana. If you would like to use this photo for experimentation, you can find it here.


First, Open your photo in GIMP.


Next, Duplicate the layer by right clicking on the layer in the palette and choose "Duplicate Layer".

Now you are going to make your new layer black and white. To do this, go up to the "Colors" menu and then choose "Desaturate"


Now here is where you can choose your method. One method is to take an eraser and erase over the areas that you want colored. The other method, which I am going to use is called a "layer mask".

To add a layer mask, make sure your black and white layer is selected, right click the layer and choose "Add Layer Mask". A box will pop up. There are many different options. For this tutorial, I chose the first option, "White (full opacity)". After that is done, you will see a blank layer attached to your black and white layer. Layer masks are used for many purposes and are good for blending images together. When you paint with black on a layer mask, it will hide the part of the image that it is attached to (like an eraser but is easier to correct if you mess up). When you paint with white on a layer mask, it will show areas that were hidden when the black was used.


Now, to get the color splash effect, click on the paintbrush tool. Choose the desired size brush, depending on the size of your photo and adjust the hardness of the brush. The higher the hardness is, the sharper the edge of the brush will be. For this particular effect, I am going to choose a plain round brush.

With your layer mask selected, paint with black (#000000) over the areas that you want colored. As explained previously, the black simply hides those areas. Zoom in or out when needed.  For this photo, I want her dress, lips and eyes to be in color so I painted over those areas.


If you erase too much, like I did below, go back over the area that was mistakenly colored with white (#ffffff). If you were to use an eraser instead of a layer mask, it is more difficult to correct these mistakes.

After all is said and done, your finished product should look like this.


And there you have it. If you have any questions, don't be afraid to ask :)

Color Splash (Photoshop)

This tutorial will show you how to make a black and white photo with a "splash" of color in it. This technique can be used for modeling competition entries and other types of edits. Here are some examples of the color splash effect:


For this tutorial, I will be using this photo of one of my models, Dana. If you would like to use this photo for experimentation, you can find it here.
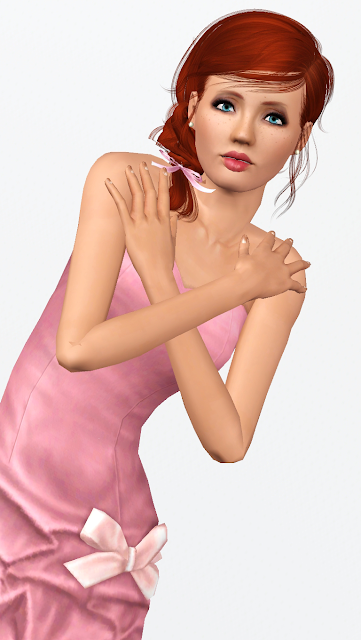

First, Open your photo in Photoshop.


Next, Duplicate the layer by right clicking on the layer in the palette and choose "Duplicate Layer". You could also duplicate the layer by going to the "Image" menu and choosing "Duplicate".


Now you are going to make your new layer black and white. To do this, go up to the "Image" menu then choose "Adjustments" and then choose "Desaturate" or you could use the keyboard shortcut by pressing Shift+Control+U.


Now here is where you can choose your method. One method is to take an eraser and erase over the areas that you want colored. The other method, which I am going to use is called a "layer mask".

To add a layer mask, make sure your black and white layer is selected and click the icon at the bottom of the layers palette that looks like a grey rectangle with a white circle in the center (shown below). After that is done, you will see another blank layer attached to your black and white layer. Layer masks are used for many purposes and are good for blending images together. When you paint with black on a layer mask, it will hide the part of the image that it is attached to (like an eraser but is easier to correct if you mess up). When you paint with white on a layer mask, it will show areas that were hidden when the black was used.


Now, to get the color splash effect, click on the paintbrush tool. Choose the desired size brush, depending on the size of your photo and adjust the hardness of the brush. The higher the hardness is, the sharper the edge of the brush will be. For this particular effect, I am going to choose a plain round brush with the size set at 50 and the hardness set at 0.


With your layer mask selected, paint with black (#000000) over the areas that you want colored. As explained previously, the black simply hides those areas. Zoom in or out when needed (Shortcut is Control +  or Control -).  For this photo, I want her dress, lips and eyes to be in color so I painted over those areas.


If you erase too much, like I did below, go back over the area that was mistakenly colored with white (#ffffff). If you were to use an eraser instead of a layer mask, it is more difficult to correct these mistakes.


After all is said and done, your finished product should look like this.


And there you have it. If you have any questions, don't be afraid to ask :)

Monday, February 13, 2012

Color Adjustments (GIMP)

 Color Adjustments (GIMP)

This tutorial will help you learn how to adjust colors in your photos. This is more a general photo editing tutorial but it can be applied to signatures as well.  I want to say ahead of time, I don't recommend using all these adjustments on one photo because it could be overly bright or contrasted. I only did them all to show the effects it has on photos (which is why my end result is a little overwhelming  xD).
First, open up the photo you would like to edit. Here is mine:


If you'd like to use this photo for practice purposes, you can find it here.

As you can see, it is pretty dark and dull.

To start out editing, I am going to go to the Colors menu and choose "Brightness/Contrast". Each photo is different so play around with the settings until you find something you like. Since my picture is pretty dark, I am going to set the brightness to 10 and the contrast to 13. Click "Edit these settings as levels"


This takes you to another adjustment that you can make to a photo called "Levels". You could access this through the colors menu as well. Again, play around with the settings until you get something you like. For my photo, I changed the values to 6, 1.00 and 145. Click "Ok".


Another adjustment you could use is "Color Balance". It is found in the same menu as the previous effects.  This is the box that pops up. Here you can slide the bars to adjust how much each color is present in the photo. For example, for my photo I moved the top bar towards Red (with a value of 20), the  I moved the second bar towards green  (with a value of 45) and the third bar I moved towards yellow (with a value of -49). Moving the bar to the right is a positive value and moving the bar to the left is a negative value. I usually just play around with the settings until I get something I like (just like I do with most things lol).


Hue/Saturation (again found in the same area) is another option to adjust color. A box pops up with three options: Hue, Saturation and Lightness. Hue is to choose the color. Saturation adjusts how light or dark the color is and lightness makes it brighter or duller. (Correct me if I am wrong, I'm not an art major so I may have gotten those terms mixed up or incorrect).  For my photo, I changed the hue value to -7, the saturation value to -16 and lightness to 14.

 
Next, is a little trick that I like to use to add a color tint to a photo and it is a lot less complicated than other options. First, make a new layer (see "Basic Techniques" tutorial if you need help).
Then using the paintbucket tool, fill the whole layer with a color of your choosing (in this case I chose a light yellow). 


After that, click on the arrow on the drop-down box on the top of the layers palette (it should say "normal" by default). Choose "Soft Light".


For this picture, the yellow came out pretty strong so I lowered the opacity (located at the top of the panel) to 65. You can use this method with gradients instead of a solid color as well. 


 This is how it looks now.


Before Adjustments:

 
After Adjustments:


As you can see, there is a big difference. As stated before, I don't normally do all those effects on one photo because it makes it really bright and at times overwhelming. This was for tutorial purposes only.

I hope this helped you guys out a bit. If you have any questions, don't be afraid to ask :)

Color Adjustments (Photoshop)


This tutorial will help you learn how to adjust colors in your photos. This is more a general photo editing tutorial but it can be applied to signatures as well.  I want to say ahead of time, I don't recommend using all these adjustments on one photo because it could be overly bright or contrasted. I only did them all to show the effects it has on photos (which is why my end result is a little overwhelming  xD).

First, open up the photo you would like to edit. Here is mine:


If you'd like to use this photo for practice purposes, you can find it here.


As you can see, it is pretty dark and dull.

To start out editing, I am going to go to the Image menu, go to Adjustments and choose "Brightness/Contrast". Each photo is different so play around with the settings until you find something you like. Since my picture is pretty dark, I am going to set the brightness to 100 and I am leaving the contrast at 0. Click "Ok"


Next adjustment that you can make to a photo is called "Levels". To access this box, do the same thing as you did before but choose "Levels" instead of "Brightness/Contrast". Again, play around with the settings until you get something you like. For my photo, I changed the values to 61, 2.31 and 255.


Another adjustment you could use is "Color Balance". It is found in the same menu as the previous effects.  This is the box that pops up. Here you can slide the bars to adjust how much each color is present in the photo. For example, for my photo I moved the top bar towards Red (with a value of 25), the second bar I left the same and the third bar I moved towards yellow (with a value of -38). Moving the bar to the right is a positive value and moving the bar to the left is a negative value. I usually just play around with the settings until I get something I like (just like I do with most things lol).


Hue/Saturation (again found in the same area) is another option to adjust color. A box pops up with three options: Hue, Saturation and Lightness. Hue is to choose the color. Saturation adjusts how light or dark the color is and lightness makes it brighter or duller. (Correct me if I am wrong, I'm not an art major so I may have gotten those terms mixed up or incorrect).  For my photo, I changed the hue value to -1, the saturation value to 24 and lightness to 11. If you check the colorize box, then you can have a color that overlays the whole photo (in this case I did not have it checked).


This is how it looks afterward:


Next, is a little trick that I like to use to add a color tint to a photo and it is a lot less complicated than other options. First, make a new layer (see "Basic Techniques" tutorial if you need help).


Then using the paintbucket tool, fill the whole layer with a color of your choosing (in this case I went with green). 


After that, click on the arrow on the drop-down box on the top of the layers palette (it should say "normal" by default). Choose "Soft Light". For this picture, it did not make too much of a difference but there are times when it helps to give a whole photo a unifying color scheme. You can use this method with gradients instead of a solid color as well.


Before Adjustments:


After Adjustments:


As you can see, there is a big difference. As stated before, I don't normally do all those effects on one photo because it makes it really bright and at times overwhelming. This was for tutorial purposes only.


I hope this helped you guys out a bit. If you have any questions, don't be afraid to ask :)